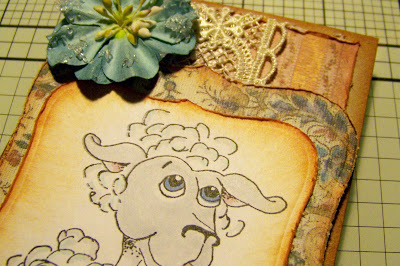
Ever finish a project and think it’s missing something? Love the look of vintage or grunge but just don’t know how to get there? Well this little tutorial will hopefully get you thinking outside the box and dirtying up your artwork for that one of a kind, never to be repeated twice look.
What tools can you use to distress?
The tools I have on hand are my sanding block, edge scraper, tweezers, scissors, distressing tool set…
Ink pads, daubers, baby wipes, paper towels…
ink misters, paints, alcohol inks, Glimmer Mists, Smooch, glue
Different styles of distressing
Dry: When dry distressing I use my sanding block, edge distresser, tearing, crumpling, fraying. Remember when sanding or edging that you will need to wipe your work area free of dust particles.
[crumpling, direct to paper, mist]
[tearing]
Wet: Tattered Angels Glimmer Mists, mister, baby wipe. You can also wet the edge of your paper before you edge it to give it an entirely different look or use your fingernail on the edge to “pull” some of the fibers out of your cardstock,
[ink dauber edges, ink misting]
[misting, tearing, direct to paper, inked edges]
[inked edges, edge distressed, ink misting]
[ink dauber edges, edge distress tool]
[edge distress tool, fraying]
Inking: sponge the edges, direct to paper I ink my pages then distress, I distress then ink. I like to use different shades of color.
[ink misting, direct to paper, ink dauber edges]
[sanding, ink dauber edges]
[ink dauber edges, ink misting, edge distressed, tearing]
[ink dauber edges, ink misting, edge distressed, tearing]
[alcohol ink, direct to paper, edge distressed and inked]
[ink dauber edges, direct to paper, alcohol inks]
[alcohol ink, sanding]
Here are a couple of great tutorials with additional info and inspiration:
- http://www.splitcoaststampers.com/resources/tutorials/distressededge/
- http://melstampz.blogspot.com/2009/03/distressing-to-z-link-list-ps.html


.JPG)


